...
Prerequisite: Successfully create a flow to generate results.
To dig deeper into your flow results, you can either click on Explore in the upper right corner of the flow page, or you can open the flow in Explore as follows:
Click Explore in the left menu bar.
In the first line of the query, click events and select the flow from the dropdown menu. If you don't see the flow in the data dropdown, check that the correct data table is selected at the top left of the page.
Make sure that the Sankey View icon at the top center of the page is selected.
Reapply any additional split by parameters to the default split by Flow Path. In our example, we also split by action.
Click GO.
Click on a successful step (marked by a non-gray vertical bar) in the sankey diagram and choose See events leading up to this state from the list.
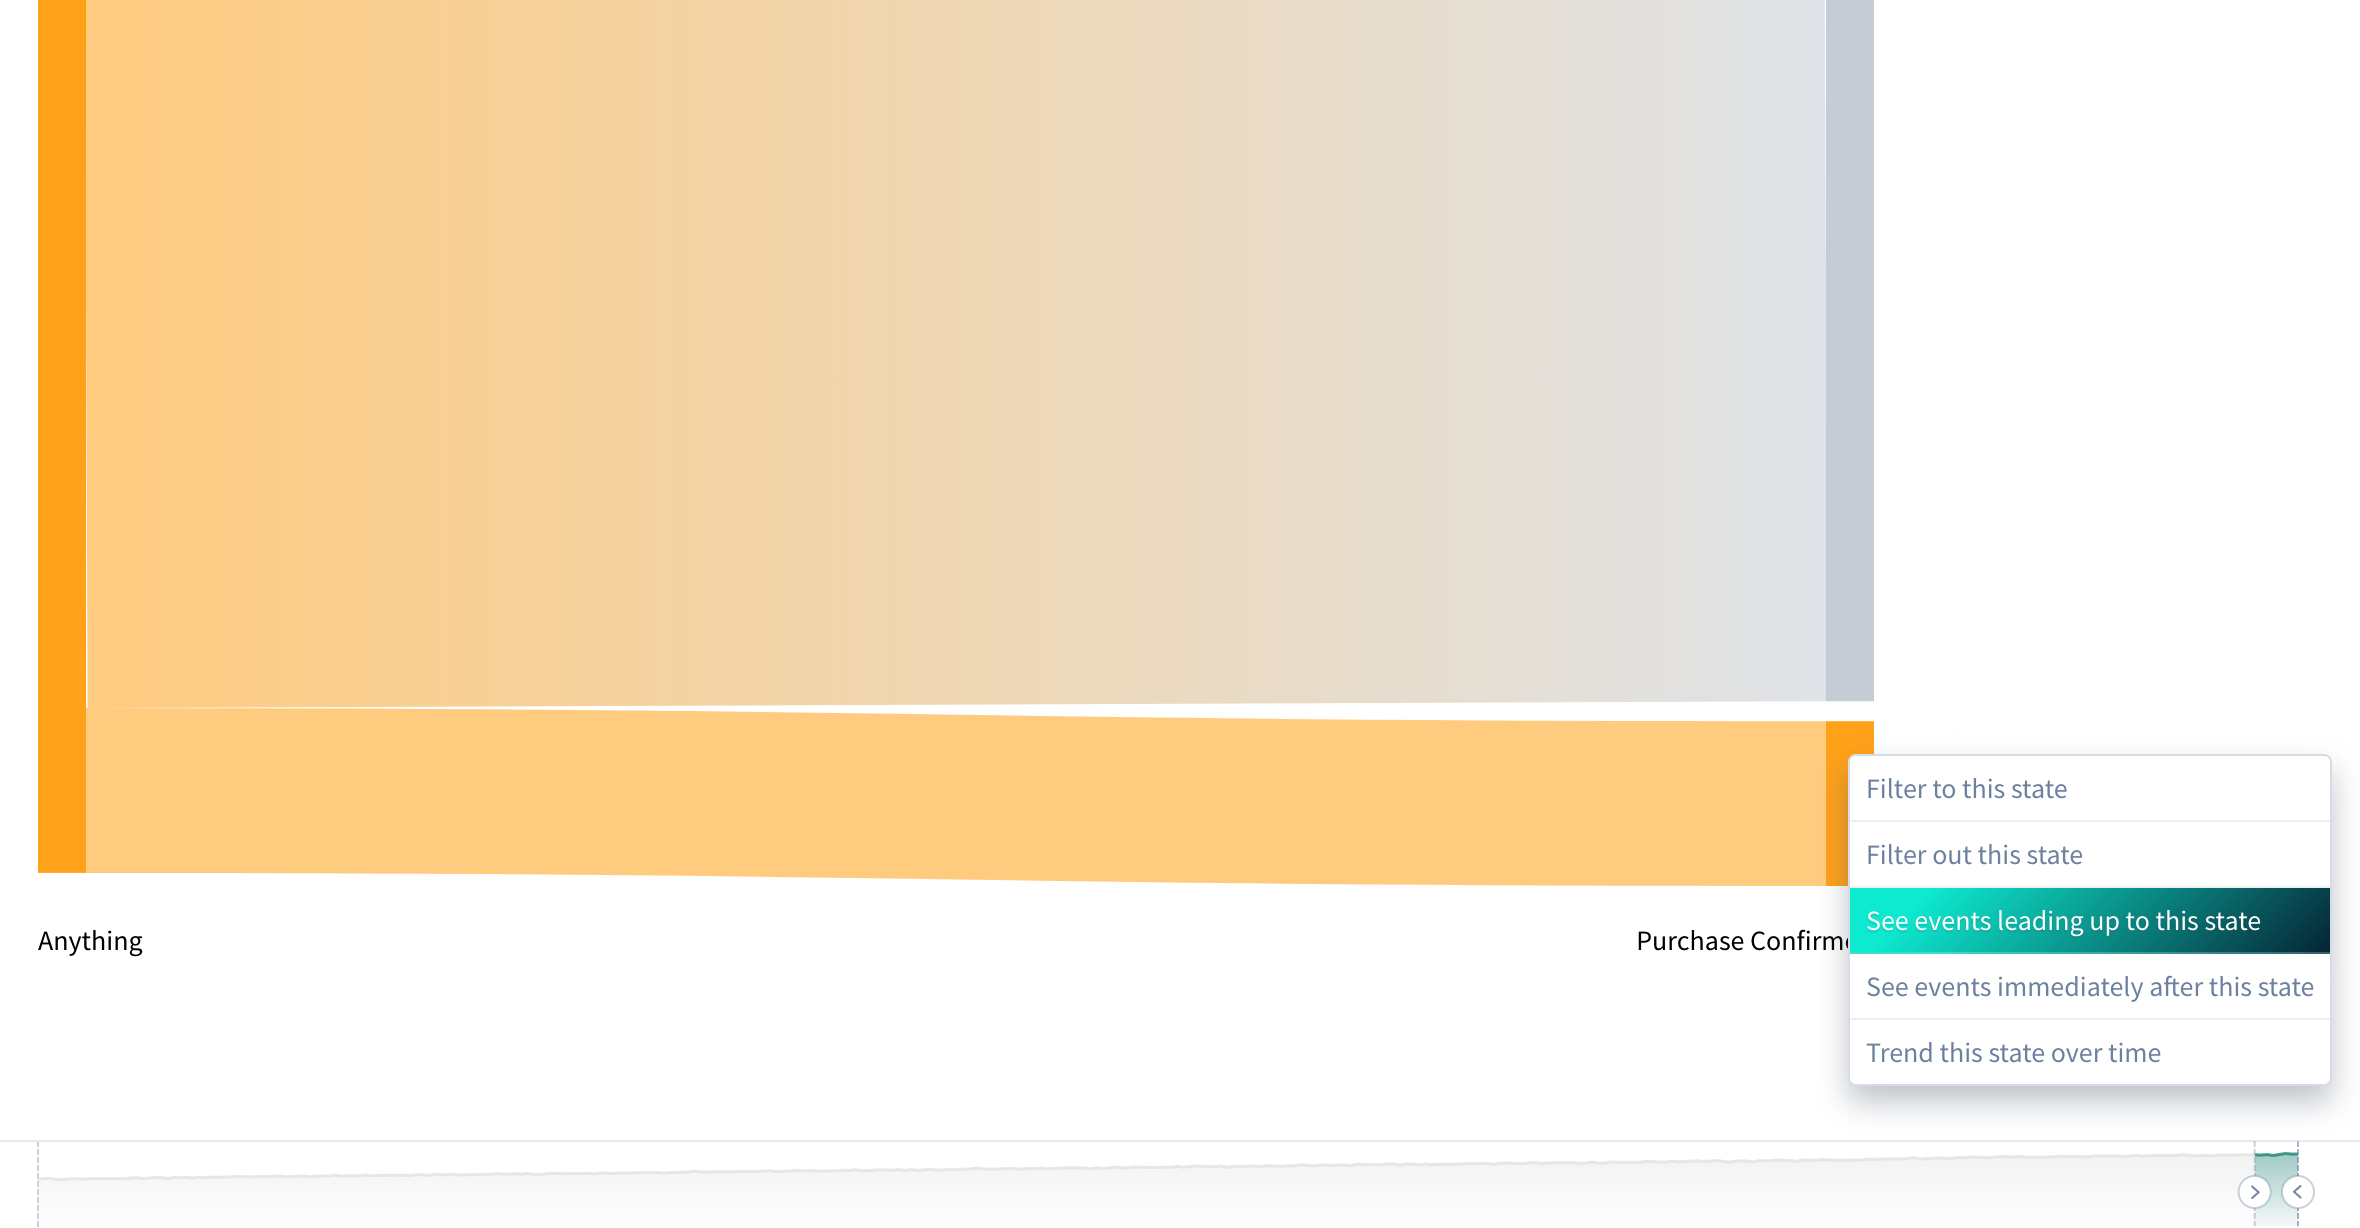
In the example of our Confirmed Purchases flow, performing this action lets us see the five events that happen immediately prior to each user's purchase_confirmed event within the flow. The diagram filters to the events prior this state and splits by event path. We received the following results for our example flow. Hover the cursor over a path to view specific details, or add another Split By to bring more detail to your chart.
...
modify an existing flow, navigate to the flow by clicking on Data in the left sidebar, then selecting Flows.
Find your flow by scrolling or searching the list, and click on it to go to the Data Model page.
From here, make any desired changes to your flow, including adding/removing steps or filters, editing the description, or sharing your flow with other users.